Pattern | How to Knit a Perfect Round Rag Rug
Knitting a round rag rug is one of those projects that combines decoration, creativity, and relaxation in equal measure.
But if you've ever tried it, you've probably encountered the typical problem: the rug doesn't end up perfectly circular, but rather hexagonal, or it curls or rises at the edges.
In this complete guide, you'll learn step-by-step how to knit a perfect round rug , with the correct increase distribution , tips for combining colors, calculating materials, and achieving a professional result.
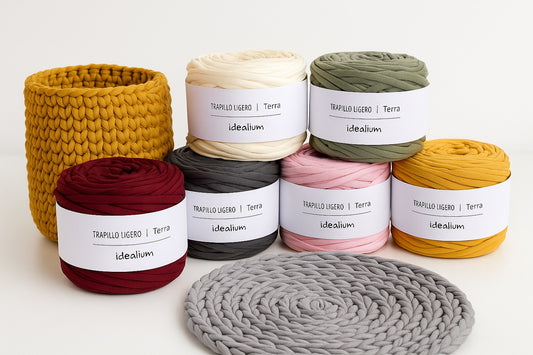
We will use Trapillo Terra as an example, ideal for this type of pieces due to its lightness, softness and uniform thickness.
Table of Contents
- Necessary materials
- Before you start: How to achieve a perfect circular rug
- How to close turns correctly
- Basic pattern for weaving the perfect circular rug
- Magnification table for a perfect circle
- How to combine colors on the carpet
- How to calculate size and material consumption
- Final tips for a professional finish
- Pattern inspiration and variations
- Conclusion and material recommendation
- Frequently Asked Questions (FAQ)
Necessary materials
Before you start, make sure you have everything you need:
- Trapillo Terra (6 spools for approximately 1 meter in diameter) → See Trapillo Terra colors at Idealium
- 10 mm crochet hook (important so that the stitch is loose and flexible).
- Scissors.
- Wool needle to hide the threads.
- Stitch marker (optional, but very useful).
💡 Tip: When knitting rag rugs, the stitch should be loose and bouncy , not stiff. If you knit too tightly, the rug will tend to ripple or curl upward.

Before you start: How to achieve a perfect circular rug
The secret to a perfect round rug is to distribute the increases correctly . If you always increase them in the same place, the circle will take on a hexagonal shape (with pronounced "peaks"). To avoid this:
- Shift the increases on each row. Don't place them all on the same stitches as the previous row.
- Count the stitches carefully at the end of each round to ensure the circle grows evenly.
- Keep the tension constant. If you knit too tightly, it will bunch up; if you knit too loosely, it will curl.
👉 In the following sections you will find the complete pattern in two versions: one in single crochet and one in double crochet , with the same increase distribution.
How to close turns correctly
When weaving a circular rug, there are two ways to advance the rows, and choosing the right one will make a difference in the final result.
🔸 Option 1: knit in a spiral (without closing the row)
In this method, the rows are worked continuously, without casting off at the end of each row. You simply continue working over the first stitch of the previous row.
It's a quick and convenient system, but it leaves a slight diagonal at the start of turns, especially visible if you change color.
That's why it's used more in monochrome or uniform texture projects.
🔸 Option 2: closing each round with a slip stitch
It is the most recommended method for rag rugs.
At the end of each lap:
- Close with 1 slip stitch over the first stitch of the row.
- Chain 1 to start the next row if working in single crochet, or chain 3 if working in double crochet.
This system maintains the perfectly circular shape, prevents shifting, and leaves the edges clean and tidy.
Furthermore, it is the one that gives the best results when combining different colors, since the joints are invisible.
💡 Idealium Recommendation:
For rugs woven with Trapillo Terra , we recommend always closing the rows with a slip stitch and chain stitching. The result will be more balanced, symmetrical, and professionally finished.
Basic pattern for weaving the perfect circular rug
This pattern works with any rag yarn, but with Trapillo Terra you'll achieve a light, even texture, without the irregularities typical of recycled rag yarn. Below we show you the two most commonly used versions: single crochet and double crochet .
Version 1: Low point carpet
Ideal if you are looking for a more closed, firm and resistant texture.

Step-by-step instructions
- Magic ring: make a ring (or 3 chains joining the 1st and 3rd with a slip stitch) and crochet 6 single crochets inside.
- Row 2: Crochet 2 single crochet stitches in each stitch (12 stitches).
- Round 3: alternate 1 single crochet, 1 increase → repeat the entire round (18 stitches).
To increase the rug's width, on row 4 we would alternate 2 single crochet stitches + 1 increase and repeat this sequence; on row 5 we would alternate 3 single crochet stitches + 1 increase; and so on... increasing 6 stitches on each round , and shifting the increases 1 stitch forward each time.
But if you always start the row the same way, the increases fall on the same vertical line, and the circle becomes deformed, taking on a hexagonal shape. Therefore, you need to vary the beginning of each row to optimally distribute the increases along the row and achieve the perfect circle.
In the following section, you'll find the chart with the pattern and exact sequence you need to knit each row to achieve the perfect circular shape on your rag rug. Instructions for up to 40 rows are included.
Version 2: High-knit rug
This version is lighter and stretchier, with a soft finish and a beautiful drape.

Step-by-step instructions
- Magic ring (or 3 chains joining the 1st and 3rd with a slip stitch), knit 12 double crochets inside.
- Row 2: Knit 2 double crochet stitches in each stitch (24 stitches).
- Round 3: 1 double crochet, 1 increase → repeat (36 stitches).
To increase the rug's width, on row 4 we would alternate 2 double crochets + 1 increase and repeat this sequence; on row 5 we would alternate 3 double crochets + 1 increase; and so on... increasing 12 stitches on each round , and shifting the increases 1 stitch forward each time.
But if you always start the row the same way, the increases fall on the same vertical line, and the circle becomes deformed, taking on a hexagonal shape. Therefore, you need to vary the beginning of each row to optimally distribute the increases along the row and achieve the perfect circle.
In the following section, you'll find the chart with the pattern and exact sequence you need to knit each row to achieve the perfect circular shape on your rag rug. Instructions for up to 40 rows are included.
🔸 Guide example: With 20 rows in double crochet and Trapillo Terra you will reach 1 meter in diameter , using 6 bobbins .
Magnification table for a perfect circle
This table will serve as a reference to correctly distribute the increases without the circle becoming deformed.
Grades:
- When "inc" is indicated, you must knit 2 stitches in the same stitch or gap, creating an increase, creating 2 stitches where there was only 1.
- The number of points is indicated in the format "XX / XX" :
- The first number represents the stitches if we knit in single crochet .
- The second number represents the stitches if we knit in double crochet .
- When knitting in single crochet, we increase 6 stitches per round. When knitting in double crochet, we increase 12 stitches per round.
- "Start of round" is only indicated when it is different from the "Sequence" to be repeated during that round. In that case, "End of round" is indicated, which will be the number of stitches missing at the beginning to complete the sequence. Rounds that begin with an increase have no difference in start and end; the round begins with the indicated "Sequence."
How to read the table:
- In v.1 there is no sequence, 6 single crochets or 12 double crochets are knitted in the center of the ring.
- In v.2 increases are made in all stitches.
- In v.3 the sequence is knitted 1 stitch + 1 increase, 1 stitch + 1 increase... on the entire row.
- In row 4, you start with the increase and knit the sequence increase + 2 stitches, increase + 2 stitches... all the way around.
- In row 5, the row starts with 2 stitches, followed by the increase. We then repeat the sequence of 3 stitches + increase until the end of the row. After the last increase, we will have 1 stitch left to knit at the end of the row.
| Lap | Homecoming | Sequence for the rest of the lap | End of the lap | Total points in each round (PB / PA) |
|---|---|---|---|---|
| 1 | - | – | - | 6 / 12 |
| 2 | - | aum - aum | - | 12 / 24 |
| 3 | - | 1 - increase | - | 18 / 36 |
| 4 | - | inc - 2 | - | 24 / 48 |
| 5 | 2 - increase | 3 - increase | 1 | 30 / 60 |
| 6 | - | inc - 4 | - | 36 / 72 |
| 7 | 3 - increase | 5 - aum | 2 | 42 / 84 |
| 8 | - | aum - 6 | - | 48 / 96 |
| 9 | 4 - increase | 7 - aum | 3 | 54 / 108 |
| 10 | - | aum - 8 | - | 60 / 120 |
| 11 | 5 - aum | 9 - aum | 4 | 66 / 132 |
| 12 | - | inc - 10 | - | 72 / 144 |
| 13 | 6 - aum | 11 - aum | 5 | 78 / 156 |
| 14 | - | aum - 12 | - | 84 / 168 |
| 15 | 7 - aum | 13 - aum | 6 | 90 / 180 |
| 16 | - | aum - 14 | - | 96 / 192 |
| 17 | 8 - aum | 15 - aum | 7 | 102 / 204 |
| 18 | - | aum - 16 | - | 108 / 216 |
| 19 | 9 - aum | 17 - aum | 8 | 114 / 228 |
| 20 | - | aum - 18 | - | 120 / 240 |
| 21 | 10 - aum | 19 - aum | 9 | 126 / 252 |
| 22 | - | aum - 20 | - | 132 / 264 |
| 23 | 11 - aum | 21 - aum | 10 | 138 / 276 |
| 24 | - | aum - 22 | - | 144 / 288 |
| 25 | 12 - aum | 23 - aum | 11 | 150 / 300 |
| 26 | - | aum - 24 | - | 156 / 312 |
| 27 | 13 - aum | 25 - aum | 12 | 162 / 324 |
| 28 | - | aum - 26 | - | 168 / 336 |
| 29 | 14 - aum | 27 - aum | 13 | 174 / 348 |
| 30 | - | aum - 28 | - | 180 / 360 |
| 31 | 15 - aum | 29 - aum | 14 | 186 / 372 |
| 32 | - | aum - 30 | - | 192 / 384 |
| 33 | 16 - aum | 31 - aum | 15 | 198 / 396 |
| 34 | - | aum - 32 | - | 204 / 408 |
| 35 | 17 - aum | 33 - aum | 16 | 210 / 420 |
| 36 | - | aum - 34 | - | 216 / 432 |
| 37 | 18 - aum | 35 - aum | 17 | 222 / 444 |
| 38 | - | aum - 36 | - | 228 / 456 |
| 39 | 19 - aum | 37 - aum | 18 | 234 / 468 |
| 40 | - | aum - 38 | - | 240 / 480 |
💡 Remember: We shift the first increase 1 stitch forward on each row. This way, you avoid the increases from lining up and your rug will be perfectly round.
If you prefer to learn by watching each step in motion, we've prepared a complete video tutorial where you can visually follow how to knit the round rug using the same pattern you just saw. In it, you'll see how to distribute the increases correctly, how to join the rows, and how to achieve a perfectly flat and circular finish.
🎥 The video corresponds to our Mediterranean Rug , woven with Trapillo Terra in double crochet, and will serve as a visual guide whether you make this version or the single crochet one.
How to combine colors on the carpet
A very simple and attractive way to personalize your rug is to weave stripes of different colors , with each color covering one or more complete rows. This not only creates a beautiful decorative effect, but also helps you keep track of the rows.

🎨 Combination ideas:
- Minimalist: neutral tones (beige, gray, white).
- Modern: strong contrast like raspberry + dark grey.
- Natural: mix of greens, sand and cream.
- Children's: powder pink, white and mint.
👉 Find your favorite shades of Trapillo Terra here .
How to calculate size and material consumption
| Approx. diameter. | Number of turns | Trapillo Terra Bobbins |
|---|---|---|
| 60 cm | 12 laps | 3 coils |
| 80 cm | 16 laps | 4 coils |
| 100 cm | 20 laps | 6 coils |
| 120 cm | 24 laps | 8 coils |
Magnitudes calculated at high point
📏 Tip: Measure the diameter with the rug spread out on a flat surface, without stretching it.
Final tips for a professional finish
- If it ripples, you're knitting too loosely. Reduce the tension a little or remove an increase.
- If it curls upward, you're knitting too tightly. Loosen or add another increase.
- To make it completely flat: When you're done, dampen it slightly and let it dry on a flat surface (a bed, towel, or yoga mat).
- To hide strands: Use a large yarn needle and insert them between the purl stitches.
- To keep it looking beautiful: gentle hand wash or machine wash at 30°C, flat dry.
Pattern inspiration and variations
From this pattern you can create many more projects:
- Coasters or trivets: same first rows with fine rag or macramé.
- Small mats: 2–3 coils → diameter 50–60 cm.
- Mediterranean version: same pattern in double crochet, with a color change every 2 rows and our step-by-step video tutorial.
Conclusion and material recommendation
Weaving your own rag rug is a wonderful experience: it relaxes, decorates, and transforms your home into a warmer, more personal space. Follow this step-by-step pattern, choose your favorite Trapillo Terra colors, and enjoy the process.
👉 See all the colors of Trapillo Terra at Idealium

Frequently Asked Questions (FAQ)
1. Why does my carpet ripple or wave?
Because it has too many stitches or you are knitting too loosely.
2. Why does it curl or shrink at the edges?
Because there are few increases or the stitch is too tight.
3. How many coils do I need?
It depends on the size. For a 1-meter diameter, about 6 spools of Trapillo Terra (knit in double crochet).
4. Can I use other types of materials?
Yes, although the result will vary. You can use the same pattern, but the size and spools needed will vary. Also keep in mind that lightweight t-shirt yarn like Terra is more flexible and comfortable than recycled or pure cotton.
5. Can I wash the carpet?
Yes, machine wash at 30°C, gentle cycle. Dry flat and avoid the dryer.

✨ Choose your favorite colors and create your rug
Discover our Trapillo Terra collection: lightweight, uniform, and perfect for weaving round rugs with a professional finish.
See Trapillo Terra