
Crochet party bag with Esencia: free pattern
FREE CROCHET PATTERN
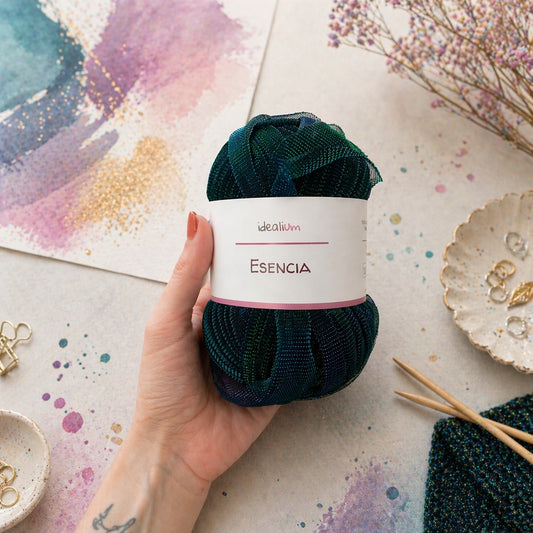
Handmade bags can also become a genuine guest accessory. In this free pattern, you’ll learn to crochet a flap evening bag with an interior structure and gold-tone chain, using Idealium Esencia, a lightweight ribbon with a delicate shimmering finish.
Its rectangular shape, metal clasp, and chain threaded through the material itself create an elegant, contemporary, and truly special bag for weddings, celebrations, dinners, and events.
We’ve brought the main materials together in a single set so you can start the project without searching for each accessory separately.

An elegant crochet bag for weddings and events
This project shows that crochet can go far beyond casual accessories. The subtle shimmer of Esencia, combined with the gold-tone accessories, transforms a simple single crochet structure into a handmade occasion bag.
The pattern is based on a crocheted rectangle that is then folded to form the body and flap. The canvas sheet adds firmness to the interior and helps the bag maintain a more defined, professional silhouette.
You can crochet it in different Esencia colors and coordinate the result with your dress, shoes, or the dominant shades of your guest outfit.
Materials for crocheting the evening bag
- 2 balls of Esencia, available in several shimmering shades.
- 1 sheet of canvas to structure the interior.
- 2 gold-tone swivel clasps.
- 1 100 cm gold-tone chain.
- 1 gold-tone metal clasp for the closure.
- 1 yarn needle.
- 1 6 mm crochet hook.
- Fabric for lining the interior, optional and not included in the set.

Before you begin
The pattern is made entirely in single crochet, making it accessible even if you don’t yet have much experience making crochet bags.
The final size may vary slightly depending on your crochet tension. Try to maintain even tension so that the sides remain straight and the flap has a regular shape.
Stitches and techniques used
- Chain stitch.
- Single crochet.
- Working back and forth in rows.
- Single crochet outline.
- Zigzag side seam.
- Weave in the ends with a yarn needle.
Free Esencia crochet bag pattern
Step 1. Crochet the starting chain
Using the 6 mm crochet hook and a strand of Esencia, crochet 25 chains.
Try not to tighten the starting chain too much so that the bottom of the fabric is not narrower than the rest of the bag.
Step 2. Crochet the rectangle in single crochet
Crochet one single crochet into each chain stitch and continue working back and forth in rows until you have completed a total of 40 rows of single crochet.
This rectangle will form the front, back, and flap of the bag.
Step 3. Crochet the outline
Without cutting the yarn yet, crochet one complete outline around the entire piece.
- Work down one side, making approximately 1 single crochet for each single crochet row.
- Continue along the bottom, crocheting into the base of the first round.
- Work up the opposite side until you return to the starting point.
- At each corner, crochet 1 additional chain to make turning easier and prevent the edge from pulling.
Close the outline, cut the yarn leaving enough length to weave in the ends, and secure the fabric.
Step 4. Shape the bag
Place the piece on a flat surface and fold it lengthwise to form a clutch. Set aside part of the rectangle to create the top flap.
Before sewing, check that both sides are at the same height and that the flap is centered.
Step 5. Sew the sides
Using a strand of Esencia and the yarn needle, sew both sides of the bag body, leaving the flap completely free.
Make a zigzag stitch, passing from one side of the fabric to the other. This stitch blends visually into the material and provides a strong join.
Step 6. Insert the inner canvas structure
Insert the canvas sheet inside the bag. Gently curve the lower section to follow the shape of the base, and trim away any excess material.
The sheet should cover the inner body of the bag, but not the flap, which must remain flexible so it can be opened and closed comfortably.
Using the yarn needle and a strand of Esencia, sew the top edge of the canvas to the top edge of the bag body. Sew only the area you have already closed at the sides, leaving the entire flap area free.
Step 7. Finish off the strands
For a neat, durable finish, insert each loose strand into the fabric using the yarn needle.
Hide it by following a zigzag path of approximately 10 cm. Then carefully cut off the excess.
Step 8. Attach the metal clasp
Position the clasp in the centre of the bag before attaching it. Check that both parts align correctly when the flap is lowered.
Attach the metal clasp following the clasp’s assembly system, making sure it is straight and firmly secured.
Step 9. Attach the carabiners
Attach a gold carabiner to each side of the bag. They should be aligned so that the chain distributes the weight evenly and the bag does not tilt when worn.
Step 10. Weave Esencia through the chain
Cut a strand of Esencia approximately 2 metres long.
Thread the yarn needle and pass the Esencia ribbon through the inside of each link of the gold chain. Always work in the same direction to achieve a continuous, even finish.
When finished, distribute the strand so it is not taut, and discreetly secure both ends. This detail visually connects the chain to the bag and gives it a much more distinctive finish.
Step 11. Attach the chain
Attach each end of the chain to one of the side carabiners.
Check that the fastenings are securely attached and that the chain is positioned correctly. The 100 cm length allows you to carry the bag on your shoulder or crossbody, depending on your height and the adjustment.
Step 12. Line the inside
For a professional, finished look, you can make an inner fabric lining. The fabric is not included in the kit materials.
The lining helps protect the fabric, conceal the seams, and prevent small items from getting caught in the stitches of the bag.

Tips for a more professional-looking bag
- Maintain consistent tension throughout the 40 rounds.
- Count the stitches periodically to maintain the width of the piece.
- Block or lay the rectangle flat before folding it.
- Position the clasp and carabiners before piercing or permanently attaching them.
- Trim the canvas little by little so you do not make it too small.
- Do not pull the strand running through the chain too tightly.
- Add a fabric lining to protect and reinforce the interior.
Personalize your guest bag
Esencia is available in different shimmering shades, so you can adapt the bag to the style of the event and the colors of your outfit.
Dusty shades create a romantic and sophisticated result; dark colors provide more contrast and elegance; and light shades are perfect for spring weddings and daytime celebrations.
You can also customize the interior with printed fabric, add a small pocket, or include a label to turn it into a truly unique piece.
Crochet the complete bag without searching for the materials separately
We have prepared a set with the main elements of this project: Esencia, canvas, chain, lobster clasps, and metal clasp.
Choose your favorite shade, add the look to your cart, and start crocheting your next bag for weddings, events, and special occasions.
Coordinated materials to recreate the look. Lining fabric not included.

Frequently asked questions about the Esencia bag
Is this pattern suitable for beginners?
Yes. The body is crocheted in single crochet, and the construction starts with a simple rectangle. You should know how to crochet chain stitches and single crochet, and how to sew with a yarn needle.
How many balls do I need?
To recreate this design, you need 2 balls of Esencia. The amount may vary slightly depending on each person's tension.
What is the canvas sheet used for?
The canvas provides structure to the body of the bag and helps maintain its rectangular shape, preventing the fabric from losing its shape when items are placed inside.
Is it necessary to add a lining?
It is not required, but it is recommended for a neater finish, to protect the interior, and to prevent objects from catching on the fabric.
Can I carry it as a clutch?
Yes. Thanks to the lobster clasps, the chain can be removed to turn it into a clutch.
Does the set include the crochet hook and yarn needle?
Yes, it is included in the bundle.