Halloween Pumpkin Basket - Crochet Rag
A more complete version of the classic autumn basket pattern, with an integrated lid and green tail. This version provides a decorative finish, perfect for use as a box, candy dish, or natural Halloween decoration 🍂

✨ Level
Beginner – Intermediate
Materials
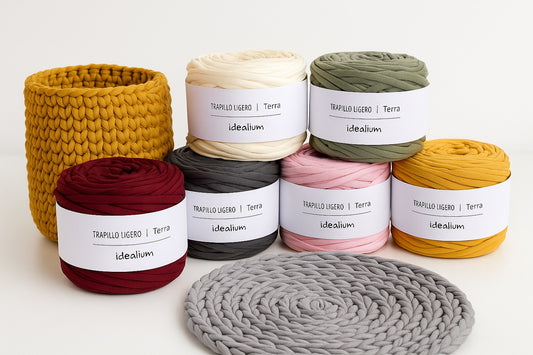
- Trapillo Terra : 2 beige bobbins (or the one you like best) + 1 dark green bobbin (for the pumpkin stem)
- Crochet hook 8 mm
- Scoreboard
- Scissors
- Wool needle


📏 Final measures
- Diameter: 22 cm
- Total height (with lid): 16 cm
Points used
- Chain (ch)
- Single crochet (sc)
- Centered single crochet (csc) → insert the needle into the center of the “V” of the previous stitch.
- Increase (inc): 2 sc or 2 sc in the same stitch
- Slip stitch (slst)
Step-by-step instructions
Base (beige color)
- Make a magic ring .
- Round 1: 6 sc inside the ring. Close with sl st. (6)
- Round 2: 1 inc in each stitch. (12)
- Round 3: [ 1 sc, 1 inc] , repeat sequence. (18)
- Round 4: [ 1 inc , [2 sc], repeat. (24)
- Round 5: 2 sc, 1 inc, [ 3 sc, 1 inc] , repeat sequence [3 sc, 1 inc] until finishing with 1 sc after the last increase (30)
- Round 6: [ 1 inc , 4 bp], repeat sequence. (36)
- Round 7: 3 sc, 1 inc , [ 5 sc, 1 inc], repeat sequence [ 5 sc, 1 inc] and finish with 2 sc after the last increase. (42)
🎃 Walls
- Round 8: Work 1 sc only in the back loop of each stitch → form the border between the base and the wall. (42)
- Rounds 9–17: Change to the centered single crochet (csc) . Crochet 1 csc in each stitch without increasing. (42)
(It will be firm, with a braided texture and the appearance of pumpkin wedges.)
🍂 Top edge
- Knit 1 round in normal sc .
- Close with 1 row in slip stitch (sl st) to reinforce.
Cut and hide the thread.
🧡 Lid (beige)
- Magic ring with 6 bp.
- Round 2: 1 inc in each stitch. (12)
- Round 3: [ 1 sc, 1 inc] , repeat sequence. (18)
- Round 4: [ 1 inc , [2 sc], repeat. (24)
- Round 5: 2 sc, 1 inc, [ 3 sc, 1 inc] , repeat sequence [3 sc, 1 inc] until finishing with 1 sc after the last increase (30)
- Round 6: [ 1 inc , 4 bp], repeat sequence. (36)
- Round 7: 3 sc, 1 inc , [ 5 sc, 1 inc], repeat sequence [ 5 sc, 1 inc] and finish with 2 sc after the last increase. (42)
👉 Check that the diameter matches the top of the basket.
-
Round 8 (edge): Work 1 sc only into the back loop to form the small edge of the lid.
Cut the thread and leave a long tail for sewing.
🌿 Little tail (moss green color)
- Make a magic ring with 6 sc.
- Rounds 2–6: Work 1 sc in each stitch (6 sc).
- Close and leave a long strand.
- Sew the tail to the center of the lid , just above the magic ring.
(Optional: add a small leaf with 5 ch + 1 sc, 1 dc, 1 dc, 1 sc, turn and close.)
✨ Final assembly
- Place the lid on the basket.
- Fit the edge of the lid slightly inside, so that it fits well.
- If you prefer, you can attach it at a single point to the back edge of the basket, so that it can be “folded” like a fixed lid.
💗 Idealium Tips
- Use beige for a natural and elegant look.
- You can vary the size by increasing or decreasing the number of turns on the base.
- For a more decorative finish, thread a thin string around the edge or add a faux leather label.
🌸 Final result
A pumpkin woven with trapillo, firm, warm and very decorative.
Perfect for Halloween or fall, while maintaining a natural aesthetic.
✨ Choose your favorite colors and create your basket
Discover our Trapillo Terra collection: lightweight, uniform, and perfect for knitting with a professional finish.
See Trapillo Terra