A complete guide to learning cross stitch step by step
If you're drawn to the world of embroidery and want to start with a simple and relaxing technique, cross-stitch is an excellent choice. In this guide, you'll learn what it is, what materials you need, and how to confidently take your first stitches.
Table of Contents

What is cross stitch?
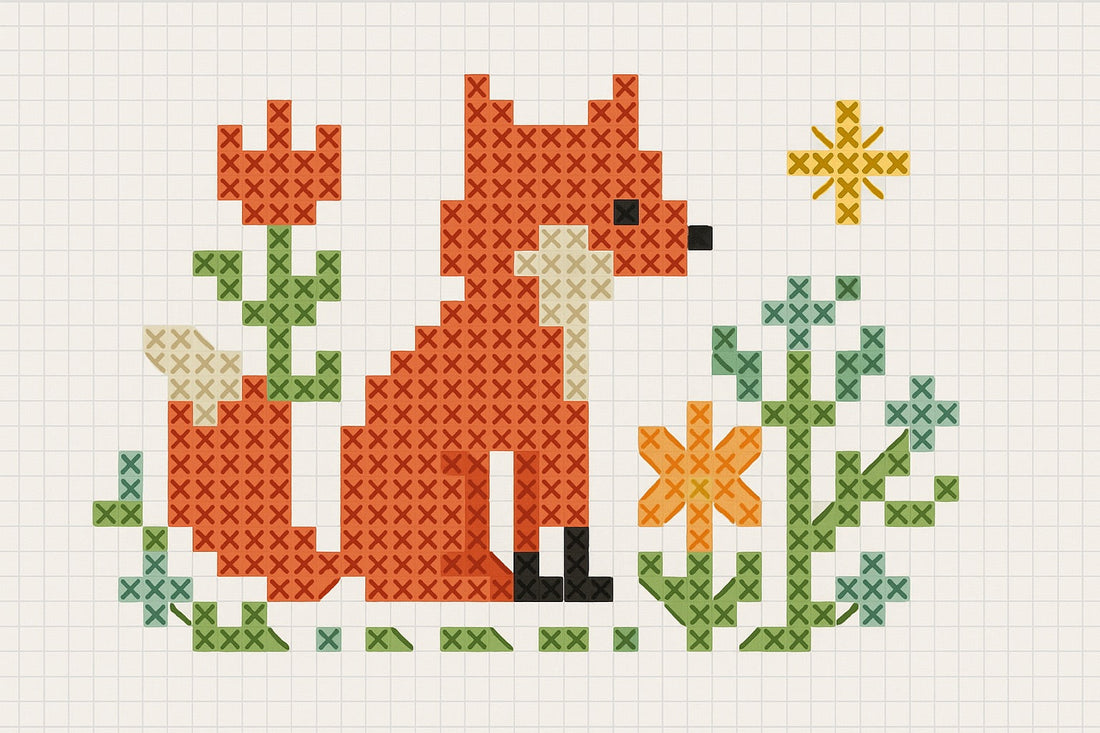
Cross-stitch is an embroidery technique that creates designs from small crosses made with thread on a grid fabric. Each stitch forms an "X" which, combined with others of different colors, creates motifs, letters, or complete illustrations. It is a precise, handcrafted, and very relaxing way to decorate fabrics or create decorative pictures.
With cross-stitch you can personalize towels, bibs, cushions, backpacks, or even clothing. Its charm lies in the patience and attention to detail: every stitch counts.
What is cross-stitch used for?
Cross-stitch is one of the most versatile embroidery techniques. It allows you to create everything from decorative designs and floral motifs to words, initials, or geometric shapes . Thanks to the wide range of thread colors, you can achieve realistic or stylized results, according to your taste.
Some of its most common uses are:
- Home decor: personalized paintings, cushions, tablecloths, napkins or curtains.
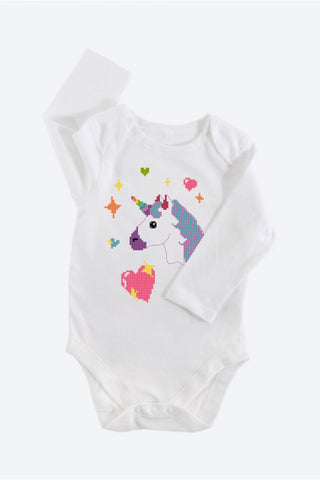
- Textile details: bibs, towels or backpacks with embroidered names.
- Personalized gifts: small handmade pieces with special sentimental value.
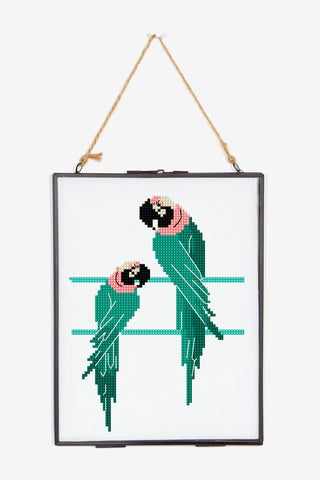
- Artistic projects: mural compositions or cross-stitch portraits with a high level of detail.
Practical ideas for cross-stitch embroidery
One of the greatest advantages of cross-stitch is that it adapts to any level and style. If you're a beginner, you can start with small, simple motifs ; if you're already experienced, you can try more complex designs or even create your own patterns.
Some ideas you can try:
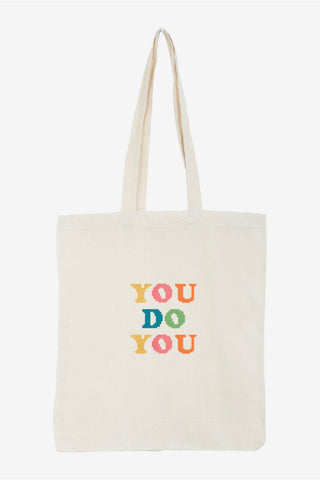
- Personalize garments: embroider an initial on a t-shirt, a heart on a jacket, or an inspirational word on a tote bag.
- Decorate your space: create pictures, borders or small prints with embroidered phrases for your sewing corner.
- Give a gift made by you: an embroidered bib, a bookmark, or a small frame with cross-stitch flowers.
- Combine techniques: add cross-stitch details to patchwork, sewing, or hand knitting projects.
As you can see, the only limit is your imagination. Cross-stitch is a patient and relaxing technique that allows you to give a unique, handcrafted touch to any fabric .

Basic materials for cross-stitch embroidery
Before you begin, gather the essential materials. They will help you work comfortably and achieve a clean, long-lasting finish.
Threads for cross stitch
Cross-stitch threads are sold in short skeins, which is ideal because only a small amount of each color is used. Embroidery typically combines several shades to achieve effects of color, volume, or realism .
The most commonly used thread is Mouliné , composed of six separable strands. This structure allows you to adjust the thread thickness according to the type of fabric or the desired effect. Its finish is shiny, smooth, and very easy to work with, perfect for achieving defined and clean embroidery.
At Idealium you will find Mouliné threads with a wide range of shades to bring your embroidery projects to life.
→ See Mouliné threads for cross stitch at Idealium

How much thread do I need for a cross-stitch project?
If you're following a pattern or diagram, it usually indicates the exact amount of thread per color . But if you're going to embroider without those references, you can easily calculate it.
Yarn consumption depends mainly on two factors: the tension of your stitches (how tightly you pull the yarn) and the color distribution in your design. To make an estimate, stitch a small sample with a full skein and count how many stitches you were able to make . This will allow you to calculate the approximate total amount of yarn needed based on the number of stitches in the pattern.
Idealium Mouliné thread skeins have a standard length of 8 meters , perfect for most cross-stitch projects. If your design combines several colors, always add an extra skein of each color to avoid running out halfway through your project.
Cross stitch needles
To work with the thread, you'll need a special embroidery needle with a rounded tip and a wide eye. This allows it to pass between the squares of the fabric without damaging it.
Needles come in different sizes : the higher the number, the finer the needle and the smaller its eye. Choose the size according to the thickness of the fabric and the number of strands you are using.

Cross stitch fabric
The most commonly used fabric is Aida , a weave with regular perforations that make it easy to count stitches and maintain symmetry. The 11 to 14 count (squares per inch) fabrics are recommended for beginners.
To calculate the amount of fabric you need, refer to the pattern measurements and add about 8–10 cm seam allowance on each side. Avoid washing the fabric before embroidering, as this could cause it to stretch and make the work more difficult.
The count value indicates the number of squares per inch: the higher the count, the smaller the stitch size . The tighter the knitting, the more delicate the result.
Tip: Fold the fabric twice (crosswise) to locate the center and start your embroidery perfectly centered.

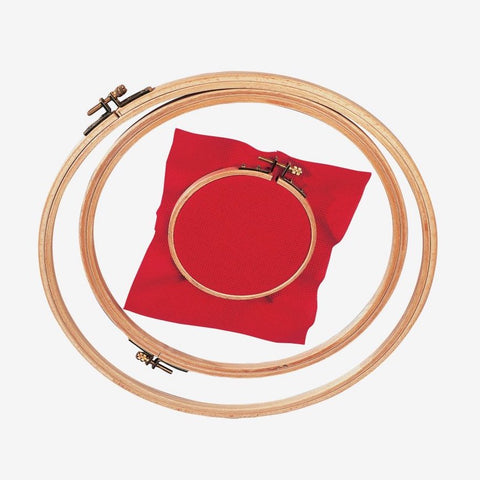
Embroidery frame
The embroidery hoop keeps the fabric taut while you work, ensuring even stitches and consistent tension . While you can embroider without it, it's very useful for large or detailed projects.
To attach it: loosen the screw, separate the hoops, place the fabric between them, and tighten again until secure. When you finish your session, remove the fabric from the frame to prevent it from warping.
Separate the strands of the cross stitch thread
Mouliné thread is made up of 6 strands that you can use together or separately depending on the desired effect or what the pattern indicates.
- Cut a length of yarn about 40–45 cm to prevent it from twisting.
- Hold the strand at one end and gently pull a single strand to separate it; you will see that the rest "folds".
- Repeat with the necessary strands (for example, use 2 strands for Aida 14 and a fine finish).
- Bring them together again, aligning the tips, and thread the needle.
Tip: If the thread curls, let the needle hang and allow it to spin on its own to loosen the excess twist.

Cross-stitch charts: how to interpret them
The diagram is the map of your embroidery. Each square represents one stitch, and the symbols indicate colors and stitch types. The pattern legend usually includes:
- Thread colors and references (you can use equivalencies with your Mouliné Idealium).
- Recommended number of strands per color or area.
- Final design size according to fabric count .
- Stitch types: full cross, half stitch, quarter/three-quarter stitch, backstitch, French knot.
Start in the center of the diagram and the fabric to ensure everything is centered. Mark the rows you've already embroidered so you don't lose your place.

How to do cross stitch step by step
Now that you know the materials and how to read a chart, you're ready to start stitching. Cross stitch is worked in horizontal rows, usually from left to right, and then back again to close the stitches. Always maintain the same orientation on the top diagonal for a uniform finish.
- Thread the needle with the number of strands indicated in your pattern (for example, 2 strands of Mouliné thread).
- Start without a knot (or with your preferred method): leave a few centimeters behind and secure them with the first stitches, or use the loop technique if you are working with folded yarn.
- Make the first diagonal from bottom-left to top-right.
- Complete the cross with the opposite diagonal (from bottom-right to top-left).
- Work in rows : first all the diagonals in one direction and when you return close them.
- Finish by passing the thread under several stitches on the reverse side and cut off the excess.
Start cross-stitch embroidery
If you prefer to start with a knot: make a small knot at the end of the thread and place it about 3 cm from the starting point, on the line you are going to embroider. Continue by crossing the thread over the previous one to secure it. When you reach the knot, slide it off, cut it flush, and continue embroidering.
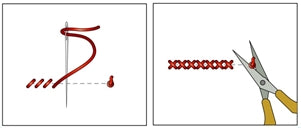
Close a thread
Pass the needle under several stitches on the reverse side to secure, without over-tightening, and cut off the excess. When starting a new section, anchor again on the reverse side before continuing.
Types of stitches in cross stitch
In addition to the full cross-stitch, there are stitches that add shading, curves, contours, and relief. I'll explain how to do them and how they're represented in the diagrams.
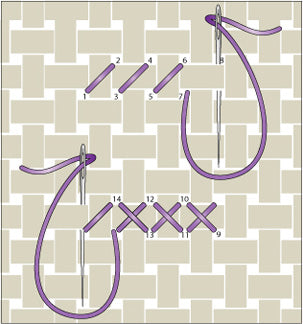
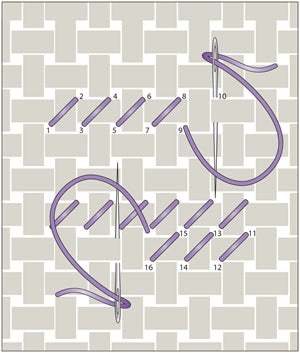
1) Complete cross stitch
- Pull the needle out through the lower left hole (1) and insert it through the upper right hole (2).
- Pull out through the lower right (3) and insert through the upper left (4) to close the cross.
- Work in rows: first all the diagonals in one direction and then go back to close them.
In the diagram: each square with a symbol (letter/shape) represents a complete cross of one color; the symbol occupies the entire cell.
2) Half stitch
Make only one diagonal; ideal for backgrounds and gradients.
- Take out through the lower left (1) and enter through the upper right (2), or follow the direction indicated by the pattern.
- Maintain the same tilt throughout the row.
In the diagram: half a shaded cell or a diagonal line in the square; in the legend it appears as “½” or “Half stitch”.
3) Quarter stitch
A line from the corner to the center of the square; perfect for curves and small details.
- Pull the needle out through a corner (e.g., bottom left).
- Enter through the center of the square to complete the quarter.
In the diagram: small triangle or corner-center line inside the cell; marked as “¼”.
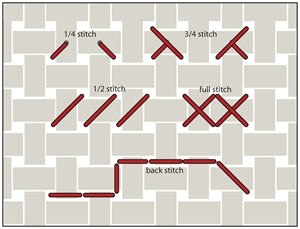
4) Three-quarter stitch
Combine a quarter stitch with a half stitch to soften contours.
- Make a quarter stitch towards the center of the cell.
- Complete with a half point in the same box according to the design direction.
In the diagram: triangle + diagonal in the same cell, or small “T” shape; indicated as “¾”.
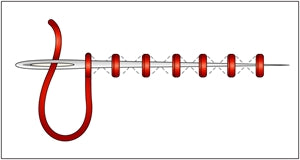
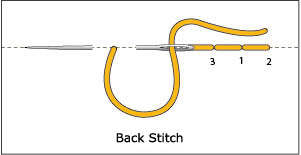
5) Backstitch
It defines and outlines fine details; it works in continuous lines.
- Serve at point 1 and enter at point 2.
- Advance to 3 and go back to 1; repeat forming a uniform line.
In the diagram: fine lines running along contours (sometimes between cell centers); in the legend: “Backstitch”.
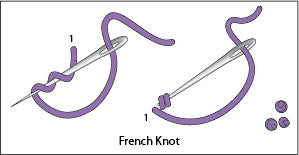
6) French knot
It adds relief (flower centers, eyes, points of light).
- Bring the needle out through the desired point and keep the thread taut.
- Wrap the thread around the needle 1–2 times.
- Insert very close to the exit point (not in the same hole) and pull slowly until the knot is secure.
In the diagram: dot/• or small circle inside the cell; legend: “French knot”.
⚠️ Common mistakes and how to avoid them
- Disordered diagonals: always maintain the same orientation on the top diagonal.
- Uneven tension: avoid puckering or open crossings by adjusting the thread tension.
- Long jumps behind: they can be transparent; anchor and retrieve close to the area you are embroidering.
- Leaving the fabric on the frame: it may mark; loosen it or remove the fabric when storing.
🌸 Final tips
Start with small designs, organize your threads by color, and label the number of strands in each section. Take your time: cross-stitch is about calm and detail. With practice, you'll be able to create unique and personalized pieces.
✨ Complete your embroidery kit with Idealium materials
Find cotton Mouliné threads, Aida fabrics, needles, and hoops for your cross-stitch projects. Everything you need for quality embroidery and to enjoy the creative process.


11 comments
Buenos días los felicito por tan grandiosa información que nos brindan por estos medios.
Quiero solicitar a usted me recomienden una aplicación para pasar fotos de personas a punto de cruz donde me aparezcan los colores de hilos que voy a utilizar; pues me gusta trabajar en fotos de personas en punto de cruz y no he podido encontrar una aplicación para esto les agradezco su buena información sobre el presente y reintegro mis felicitaciines