How to knit a pouch or clutch from t-shirt yarn or cord
A pouch or clutch knitted with t-shirt yarn or cord is one of those projects that looks brand new if you pay attention to three things: structure , seams , and closure . Plus, it's quick, perfect for gifts, and an ideal way to practice professional finishing techniques.
In this guide I explain how to do it step by step (without a closed pattern so you can adapt it to your size), with construction options, recommended stitches and tricks to make the bag straight, firm and beautiful.
Index
- Pouch vs. clutch: which one suits you best
- Recommended materials
- The best spots for a firm finish
- 3 constructions that work (choose yours)
- Step by step: in panels (the most professional)
- Step by step: a folded piece (quick and clean)
- Step by step: in a round shape (like a toiletry bag)
- Closures: kiss-lock, zipper or snap
- Lining and reinforcements: how to achieve structure
- Finishes to make it look "store-bought"
- Typical mistakes and solutions
- Materials at Idealium
Pouch vs. clutch: which one suits you best
- Pouch: It's usually softer and more functional (like a toiletry bag or small pouch). It can have a zipper and doesn't need such a rigid structure.
- Clutch: look for a more "straight" and elegant shape (envelope), often with a metal clasp or closure. Here, the structure and lining determine the final result.


Recommended materials
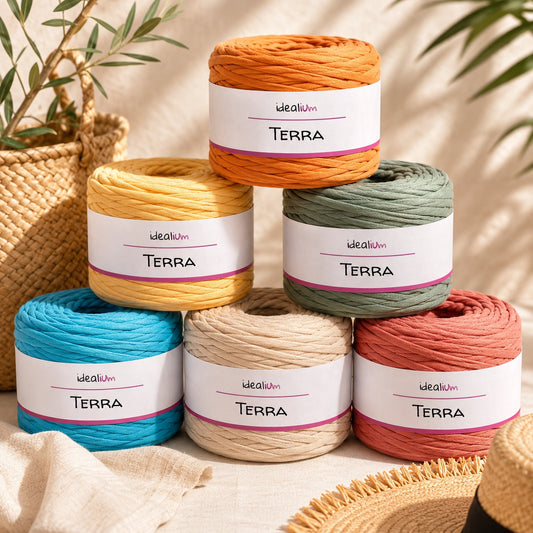
- T-shirt yarn or cord (preferably regular so that the stitch looks neat).
- Crochet (the important thing is that the stitch is compact, without gaps).
- Markers (if you are knitting in the round).
- Heavy-duty wool needle for sewing.
- Optional (highly recommended for clutch): lining, base/inner structure and closure (mouthpiece, zipper or clasp).
Tip: For pouches/clutches, the goal is a tightly woven fabric. If there are gaps, the bag will lose its shape and the closure will look less neat.
The best spots for a firm finish
- Compact low point: the basic that works, clean and durable.
- Centered low point: firmer and with a "pro" texture (ideal for clutch).
- Stable “grain” textures: provide structure and conceal irregularities.
For elegant clutches, a centered low point or a stable texture, especially with a cord, usually wins.
3 constructions that work (choose yours)
1) In panels (front + rear) — the most “pro” option
Total control of measurements, clean corners and a very good finish when installing closures.
2) A folded piece (envelope type) — quick and clean
You knit a large rectangle, fold it, and sew the sides. Perfect for a simple clutch.
3) Round (base + walls) — ideal for pouch/toiletry bag
It works great if you want soft volume and a seamless interior.
Step by step: pouch/clutch on panels (the most professional)
1) Decide on measures
A comfortable (guideline) range would be:
- Clutch: 22–28 cm wide x 14–18 cm high
- Pouch: 20–26 cm wide x 12–16 cm high
2) Knit the first panel
- Assemble the base chain of the width .
- Knit rows back and forth until you reach the top .
- Finish off and leave a long enough thread if you want to sew with the same material.
3) Knit the second panel the same
Do it with the first one next to it and count the rows. In this type of bag, even a 1 cm difference makes a huge difference.
4) Align and sew
- Place the panels together and align the corners.
- Mark with markers: corners and centers.
- Sew sides and base with a strong seam (tanning needle or crochet stitch).
Recommended stitching: for a discreet finish, invisible stitching with a needle; for maximum strength, crochet joining with a slip stitch or single crochet stitch.
Step by step: a folded piece (quick and clean)
Ideal for envelope-style clutches.
- Knit a rectangle twice as high (plus a margin for a flap if you want one).
- Fold the rectangle to form a bag (and flap, if applicable).
- Sew the sides.
- Reinforce the top edge and attach the closure.
Step by step: in a round shape (pouch/toiletry bag type)
This option is great if you want a pouch with soft volume.
- Knit an oval base (or rectangular if that suits you better) with increases until you reach the desired size.
- Mark the base/wall break with a transition turn (e.g., on back loop/BLO).
- Climb walls without increasing in height until the desired height is reached.
- Prepare the top edge for the closure (reinforcement).
Closures: kiss-lock, zipper or snap
Metal nozzle (classic clutch)
- It provides structure and a premium finish.
- The fabric must be compact so that the nozzle sits properly.
- It is usually sewn by hand with firm and regular stitches.
Zipper (functional pouch)
- Very practical for a toiletry bag or everyday bag.
- With a lining, the finish is greatly improved.
- Recommendation: Mount the zipper on the lining and then attach the assembly to the fabric.
Snap/Magnet
- Ideal for a simple clutch with a flap.
- It is advisable to reinforce the clasp area with a small piece of fabric/interfacing on the inside.
Lining and reinforcements: how to achieve structure
If you want a clutch that holds its shape, the lining is not optional: it's the "secret" to the finish.
- Lining: improves the shape, protects the interior and prevents the fabric from stretching.
- Interior reinforcement: a lightweight interlining or structure helps the bag to stand straighter (especially in clutches).
Pro tip: If you're looking for a "boutique finish," combine: compact knit + lining + a secure closure . The fabric is completely transformed.
Finishes to make it look "store-bought"
- Clean corners: mark corners before sewing and sew with steady tension (without puckering).
- Firm top edge: 1–2 rounds of compact single crochet or one round of loose slip stitch.
- Fabric hydration: if the material allows, "adjust" the panel by hand on a table before sewing.
- Thread finishing: hides well on the inside and reinforces stress points.
Typical mistakes and solutions
The bag is crooked
Solution: equal panels (count rows) and alignment with markers before sewing.
The seams are opening
Solution: crochet stitching for maximum strength or double inner stitching.
The zipper doesn't close properly.
Solution: more compact fabric and reinforcement/lining to stabilize the bag opening.
The pouch stretches with use
Solution: more compact stitch + lining; in clutches, add internal structure.
- T-shirt yarn and cord for bags with body and defined finish.
- Accessories: nozzles, closures, chains and fittings.
- Markers and a sturdy woolen needle for finishing and sewing well.
- Optional: lining and interior reinforcements for a premium finish.
A good pouch/clutch is a small but very "technical" project: success lies in the compact knit, clean stitching, and a well-placed closure. If you pay attention to these details, the result is elegant and durable.