How to raise the sides of a knitted bag in the round without distorting it
You knit the base, everything's going perfectly… and as soon as you start working the sides, the bag opens up, ripples, gets squashed, or ends up at an odd angle. Don't worry: it's not that you're doing it wrong. It's one of the most delicate parts of knitting a bag in the round, because you're going from a flat surface (the base) to a three-dimensional shape (the sides), and that change requires very precise technique and tension control.
In this article I'll show you several ways (and pro tricks) to raise walls without warping them , choosing the option that best suits your material, your point and the finish you're looking for.
Index
- Why does it warp when climbing walls?
- Before you go up: 3 quick checks
- Method 1: Create the angle (BLOCK / back loop)
- Method 2: “Turning point” with slip stitch or transition turn
- Method 3: Climbing by weaving along the edge (straighter wall)
- Typical mistakes and how to correct them
- Which method to choose depending on the material and the point
- Frequently Asked Questions
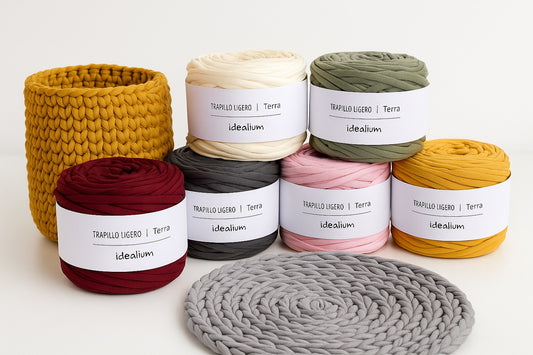
- Recommended materials
Why does it warp when climbing walls?
When you make a round base, you've been increasing stitches to keep the circle/oval flat. If when starting the walls:
- If you keep increasing unintentionally (by mistake or by confusing points), the base opens and undulates;
- The tension is too loose , the wall doesn't "hold" it and it sags;
- You don't mark the break between the base and the wall, the fabric tries to stay flat and the "hat" effect appears;
- Your material is elastic ; the bag is very sensitive to any change of hand or position.
The key is simple: create a clean angle and keep the number of points stable during the first few wall turns.
Before you go up: 3 quick checks
- Count the points from the last base round and write them down. That number should (usually) be maintained when starting the wall.
- Lock it by hand : Place the base on a table and gently "push" the edge upwards. If it already waves flat, the base has too many points or is too loose.
- Mark the beginning of the turn with a marker. Many distortions come from losing the starting point and adding increases without realizing it.

Method 1: Create the angle (BLOCK / back loop)
This is the most common method for creating a natural "fold" between the base and the wall, allowing it to rise straight. It involves knitting the first row of the wall using only the back loop (BLO). This creates a "line" on the outside, marking the break between the base and the wall.
How to do it (step by step)
- Finish the last base round and make sure of the point count .
- On the next round (first wall round), knit your stitch (single crochet, center single crochet, half double crochet…) only through the back loop of each stitch.
- In the following rounds, return to normal knitting (picking up both loops), keeping the same number of stitches.
When does it work best?
- If you're looking for a clean angle and a well-shaped wall.
- If the bag is unlined or has a medium structure (because the break line looks nice).
- In compact stitches (single stitch, centered single stitch) and bodyy materials.
Pro trick
If you notice the edge opening up as you lift, do two consecutive BLO turns (only in very elastic cases) and then continue normally. This "fixes" the angle.
Method 2: “Turning point” with slip stitch or transition turn
Another way to avoid distortion is to create a transition loop that "blocks" the edge. This is useful when you don't like the BLO (Blocked Loop) or when your main stitch already creates texture and you prefer a more subtle break.
Option A: 1 round of slip stitch (in both loops)
- After finishing the base, knit one complete round of slip stitch (without increasing or decreasing).
- Then start the walls with your usual stitch.
Advantage: It reinforces the edge and marks the change with a very subtle line.
Note: The satin stitch is tight. Keep your hand relaxed to avoid shrinking the perimeter.
Option B: 1 "firm" round in very compact single crochet
If you are going to crochet the walls with a higher stitch (half double crochet, double crochet), it can help to do a transition round in compact single crochet to stabilize.
Method 3: Climbing by weaving along the edge (straighter wall)
This method creates a very straight and structured wall. It's often used when you want a bag with a boxy (more architectural) profile. Instead of knitting over the stitches of the last row, you work on the edge of the fabric (the side strands), as if you were "building up" the wall.
How to do it
- The base is finished.
- Insert the crochet hook into the edge of the stitch (the side loop) and work a single crochet (or whatever stitch you are using) around it, keeping an even count.
- Continue in a circle as usual.
Important: The count here may vary depending on how you "take" the slate. If you do, it's a good idea to mark every 10–20 points and check that you're not adding extra points.
Typical mistakes and how to correct them
1) “Hat” effect (it ripples outwards)
- Cause: there are too many points (involuntary increases) or too loose a tension.
- Quick fix: undo 1–2 rounds and repeat the transition (BLO or slip stitch) keeping track of the count.
- If you're already ahead, make a round of gentle decreases (for example, 1 decrease every 12–16 stitches) and continue straight. It's better to make a few decreases evenly spaced.
2) It "goes in" (closes too much)
- Cause: tension too tight, or a row of satin stitch that is too tight.
- Fix: switch to a slightly looser stitch (same needle, looser hand) or eliminate the slip stitch round.
3) “Peaks” or an irregular break are seen
- Cause: Offset lap start without marker, or unstable count.
- Adjustment: Use a starting marker and count every 2–3 rounds. If the bag is large, also mark every 20 stitches with auxiliary markers.
Which method to choose depending on the material and the point
- If your material has elasticity or tends to "open up": start the wall with BLO (and if necessary, 2 rounds of BLO).
- If you want a very subtle break and a reinforced edge: use 1 round of slip stitch as a transition.
- If you're looking for a very straight and structured way: try climbing up the edge .
- If you knit with a very compact stitch (single/centered stitch): BLO is usually the cleanest option.
- If you're knitting with higher stitches: consider a transition round of firm single crochet before continuing.
Frequently Asked Questions
Do I have to maintain the same number of points every time I level up?
In most bags, yes: when starting the wall, it's normal not to increase the stitches . Later, if you want to shape it (widen, narrow, create a bucket-shaped base, etc.), you'll make increases or decreases, but only after stabilizing the break.
How many laps are "critical" when climbing?
The first 2-4 turns of the wall. If those are firm and with the angle well defined, the bag usually goes up straight without surprises.
What do I do if the base is already wavy before I put it on?
The problem isn't with the walls; it's with the increases at the base. The solution is to adjust the increase rate (fewer increases) or to knit with more tension so that the circle/oval lies flat.
- Material with body and regularity (the wall “stands up” better).
- Stitch markers to control lap start and counts.
- Rigid base or internal reinforcement if you're looking for a "box" effect.
Final tip: If you only make one change, make it this: mark the break (BLO or transition) and count points when starting the walls. That combination is 80% of the success.