Round handbags: when to choose this method and when not to
Crocheting a bag in the round (in a spiral or by closing rounds) is one of the most popular ways to make crochet bags with t-shirt yarn and cord: it's quick, practical, and very rewarding. But… it's not always the best option.
In this article we'll see it clearly: when the round method gives you the best results , when it's better to choose another construction, and what signs help you decide before you unpack half your bag.
Index
- What does “knitting a bag in the round” mean?
- Advantages of knitting bags in the round
- When to choose the round method
- When NOT to choose it (and what to do instead)
- Spiral vs. closed loops: which one suits you best
- Tricks to make the round look professional
- Typical mistakes and how to avoid them
- Quick decision checklist
- Recommended materials
What does “knitting a bag in the round” mean?
When we talk about round bags, we usually refer to a construction where:
- You knit a base (circular or oval) with increases.
- Then you go up the walls by weaving around them, without side seams.
Within the "round" approach, there are two very common ways of working:
- In a spiral: you don't close the loop; you continue knitting and the beginning shifts slightly.
- In closed rounds: close with a slip stitch and chain stitch at the beginning of each round.

Advantages of knitting bags in the round
- Zero side seams: clean, comfortable and durable finish.
- Faster (especially with compact stitches): you concentrate on knitting and that's it.
- Ideal for beginners: the construction is easy to understand.
- Great size control: you can test it while driving and adjust the height.
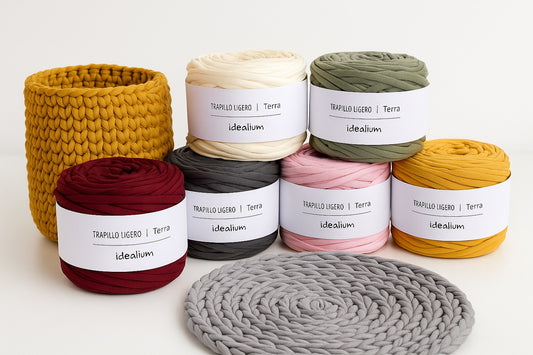
- Perfect for materials with body: t-shirt yarn and cord usually look great this way.
When to choose the round method
The round method is a safe bet when you're looking for a practical, durable bag with a seamless finish.
1) Bucket or sack bags
They are the natural shape of a round knit: base + sides + top closure. If you use a tight stitch, they hold their shape very well.
2) Mini bags and compact crossbody bags
In small sizes, the round shape works especially well because the bag doesn't carry as much weight and the fabric maintains its structure.
3) Baskets and "box" bags (if you want structure)
If you're interested in a straighter profile, you can reinforce the change from base to wall and choose a firm point (for example, a centered low point or stable textures).
4) Designs where the pattern is repetitive
Stripes, simple textures, repeating turns… the round allows for a very consistent and pleasant execution.
5) If you're looking for a cleaner interior
Without side seams, the interior looks more "polished" (and even more so if you line it).
When NOT to choose it (and what to do instead)
Here's the useful part: some bags, knitting in the round complicates the result or forces you to make constant corrections. In those cases, it's best to choose a different construction from the start.
1) If you need a very "flat" bag (like a rigid envelope/clutch)
A clutch often benefits from flat (two-sided) pieces to ensure a perfect profile, especially if it includes a nozzle, rack, or internal structure.
Alternative: knit two identical panels flat and join them, or knit flat and fold.
2) If you want very sharp corners or a completely rectangular shape
In round shapes, an oval/circular base is the most natural. Making "square" corners is possible, but it requires technique and can cause deformation if the material is elastic.
Alternative: construction by panels (front/rear/sides) or rigid rectangular base + raised walls.
3) If your design depends on a drawing that must be centered
In spirals, the starting point of the loop shifts, and in closed loops, the join appears. If the motif needs to be perfectly aligned (for example, a centered geometric pattern), the round can be tricky.
Alternative: flat panels (easier to control), or round with closed turns and "invisible" joints (requires more technique).
4) If the material deforms easily and the bag is going to carry weight
Very elastic yarns or very soft cords can give way on high walls if the bag is going to carry weight (large shoppers, for example).
Alternative: flat panels (more tension control), structured lining, or combine with rigid base/inner structure.
5) If you hate the "jump" of the back zipper
Some people don't like to see the seam (even if it's minimal). If you're looking for a completely uniform finish, the usual method is to use a spiral and "trick" the final closure.
Alternative: knit in a spiral + close with a finishing technique (even out the last round).
Spiral vs. closed loops: which one suits you best
- Choose spiral if you want the most uniform weave possible and without a visible "seam".
- Choose closed loops if you need to control start/finish for color changes, centered motifs, or exact repeats.
Important note: with t-shirt yarn, many people prefer a spiral because the thickness of the material makes the loop closure more noticeable.
Tricks to make the round look professional
- Always use a starting marker .
- Count stitches at the end of each round during the base. The flat base relies on a stable count.
- Mark the base/wall break (e.g., a back loop/BLO turn or a firm transition turn).
- Do 2–4 “critical” turns with more attention : that's where it's decided whether the bag goes up straight or ripples.
- Reinforce the top edge (one or two tighter turns help prevent the bag from opening).
Typical mistakes and how to avoid them
The base is wavy
- Cause: too many increases or loose tension.
- Solution: Adjust the pace of increases and control the count; knit a little tighter.
The walls open up like a hat
- Cause: The base/wall angle has not been marked or there are unintentional increases.
- Solution: BLO turn or transition; recount points.
The return closure is very noticeable.
- Cause: slip stitch + chain too obvious or uneven tension.
- Solution: Try a spiral, or work a more discreet joint and keep the tension constant.
The bag gives way under the weight.
- Cause: loosely packed point, highly elastic material, or excessive height.
- Solution: firmer point, structured lining, rigid base and reinforcement on handles/top edge.
Quick decision checklist
Answer these 6 questions and you'll have made your decision:
- Do I want zero side seams ?
- Is the shape rounded/oval or do I not care?
- Will the bag carry a medium weight (not a giant shopper)?
- Is my point compact (low point, centered, stable textures)?
- Don't I need a super focused reason?
- Am I willing to use a marker and count points on the base?
If you answered "yes" to most of them, then it's going to work great for you .
- Stable and regular material (helps to make the base flat).
- Scoreboards for the start of the round and the distribution of points.
- Rigid base or internal reinforcement if you are looking for a bag with structure.
Knitting in the round is an amazing construction technique for bags if it suits the shape and intended use. If you choose it well (and clearly define the bottom/wall break), the result is clean, sturdy, and has that professional finish we're looking for.